When you are in school or anywhere doing classwork or homework you need to write a lot. And for writing, you need highlighter, pencil, pens, gel pens, sketch pens, and so many others. Then there are many accomplishments like an eraser, mini-stapler, post-i. Move on to some other important stuff that you need like keys, coins and hand sanitizers that come to my mind.after carrying all of this stuff you need to have a pencil pouch or pencil box. Here little treehouse is showing you some easy steps of making a pencil box.
DIY Project- Pencil Box
We are showing you some steps of a pencils box or cases, and you will make your own in less than 30 minutes.
A Simple Flat Zipper Pouch
A flat compact pencil box or case which easily fits all the elements and products that you need for writing. This flat zipper pouch will easily fit into your bag and there is no worry of a mess.
How To Make This Pencil Box, Pouch
Step 1: cut out fabric pieces
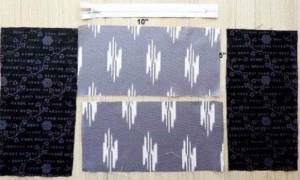
All you need in the first step is fabric. Cut a piece of fabric in 2 pieces for the outer layer and cut 2 pieces for the inner layer with the same dimensions. And the dimensions will be 10 inches by 5 inches. Remember you also need a coordinating zipper.
Step 2: place fabric on the table
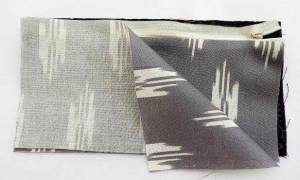
You have to keep the lining fabric on the face of the table.put the zipper on the top edge of the fabric. Then slightly place down the outer layer on the face down to the table ( as showing in the picture below ).
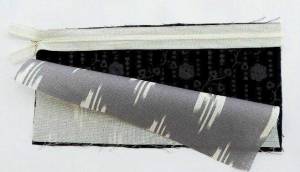
Guess what! The first side of the pouch is going to ready. Just stitch the edge and turn the zipper out of it.
Step 3: join fabric pieces
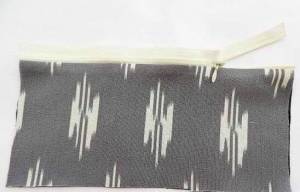
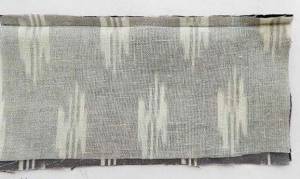
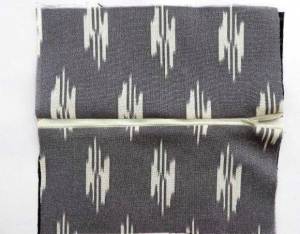
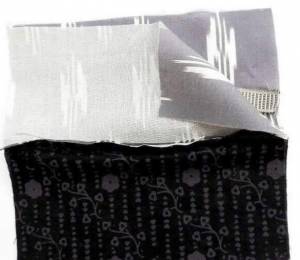
Join the other sides of the fabric pieces. Then place the other lining on the face of the table. Keep the side that you made before, then attached it on top of this ( as showing in the picture below).
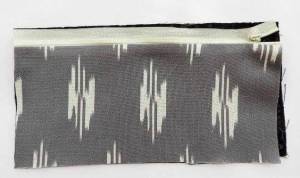
Keep the face down in a triangle shape of the outer first layer of fabric. Stitch the lining and edges. Just take a look at the thing that you’ve done. You get in the zipper in the middle of the outer and inner lining.
Step 4: add a small strap to the case
You may want some small strap addition in this case for carrying it in a little easy way. Take a small strap and cut it on the 4 inches.
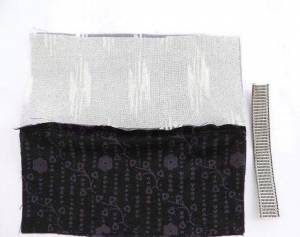
Turn the fabric side to the outer fabric side as in the picture below and add lining Zipp on the other side of the zipper. Place the strap folded inside to the outer side case pieces.
Then easily stitch it.
Step 5: a whole ready box or case
Get the case out of the linning through the hole of linning. Remeber clip the corner before doing this. Stich the hole and close everything and here you have a beautiful and pencil box/case.

Why Do We Need a Pencil Box?
Having a pencil box is just with the intention of keeping small things, products or elements in one place, like pencils. In this case, we also contain some stationary like eraser, glue, stapler, and sticks. Some pencil boxes or cases are doubled like in the shape of makeup bags. Just like the one we made in this blog. Early pencil boxes are in circle, round or in cylindrical shapes. Pencils cases or boxes are made of a variety like fabrics, wood, metals. Some of these cases are having a rigid shell encasing the pen inside, while others are like uses a soft material ( fabric, cotton, plastic or leather). In 1946, the first patent for the pencil box was intended in unites states. And this case was made by Verona pearl Amoth ( also made some tools like replaceable erasers for pencils).
The pencil case is also great in sending to kids on their birthday and start of their schools. It affects children in a very good and effective way, shows that you are having an interest in them and their studies. So make sure to gift them at last for once.
We hope this blog will help you. How you make your pencil box? Let us know.


Add Comment